How to install NVMe SSD on ASUSTOR AS6508T NAS

Installing an SSD (or two) inside the ASUSTOR AS6508T is a sure way to improve performance with the drive(s) acting as a form of cache. This makes accessing data stored on the NAS a quicker process, especially if multiple users are doing so. This guide will show you how easy it is to install an SSD.
Products used in this guide
- Serious NAS: ASUSTOR AS6508T ($1,097 at Newegg)
- Improve performance: Samsung 970 EVO Plus (From $75 at Amazon)
How to install an NVMe SSD
- Remove the three small screws on the rear of the NAS, using a Philips screwdriver.
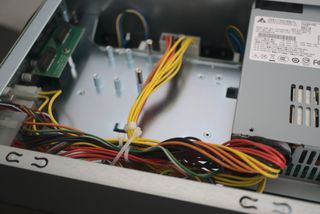
- Extract the outer shell by pushing towards the rear and lift the panel up.

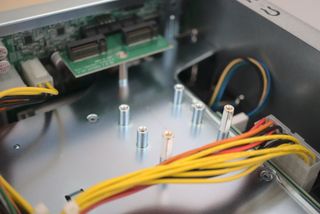
- Locate the two M.2 slots on the top of the inner chassis. (If your M.2 drives aren't 2280, meaning 22mm wide and 80mm long, you'll need to re-position the pre-installed standoffs.)
- Install the SSDs using screws provided with the ASUSTOR NAS to secure them in place.
- Re-install the outer shell.
- Secure the NAS together with the three small screws removed in step 1.
Now you're ready to pop into ADM and add the SSD as a cache. It's worth noting that if you plan on using the SSD cache for read-only, you'll be fine with one or two drives in RAID 0. Still, if you plan on writing to these SSDs for storage on your installed HDDs, I strongly recommend you have two in a RAID 1 configuration for data redundancy.

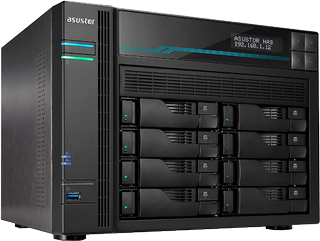
You're going to need the ASUSTOR AS6508T. If you're looking for an 8-bay NAS with upgradable RAM, M.2 SSD slots, and an Intel processor, this is a solid example. It's a killer mid-tier NAS for the home or small office.

To take advantage of the cache feature, you'll need a good SSD and the Samsung EVO 970 Plus is about as good as you can get for performance and value.
Get the Windows Central Newsletter
All the latest news, reviews, and guides for Windows and Xbox diehards.

Rich Edmonds was formerly a Senior Editor of PC hardware at Windows Central, covering everything related to PC components and NAS. He's been involved in technology for more than a decade and knows a thing or two about the magic inside a PC chassis. You can follow him on Twitter at @RichEdmonds.
